Configure and generate a layout

Configuring a new project consists of the following steps:
- Uploading a KML containing at least 1 development area
- Building a custom tracker (Optional)
- Generating a PV layout
- Running the project
- Retrieving the output reports
Uploading a KML and selecting the correct development area

It is important to ensure that the uploaded KML conforms to AUTOPV™'s specifications for KML labelling. The guide for setting up KML files can be found How to's section. Click the Edit kml button to open the upload kml dialog. Here a new kml can be uploaded or an existing one can be deleted or replaced.
After clicking the confirm button, the historical meteorological data for the site will be downloaded based on the data source selected.
Correctly configured kmls will have development areas appear green, exclusion zones red and all other features blue.
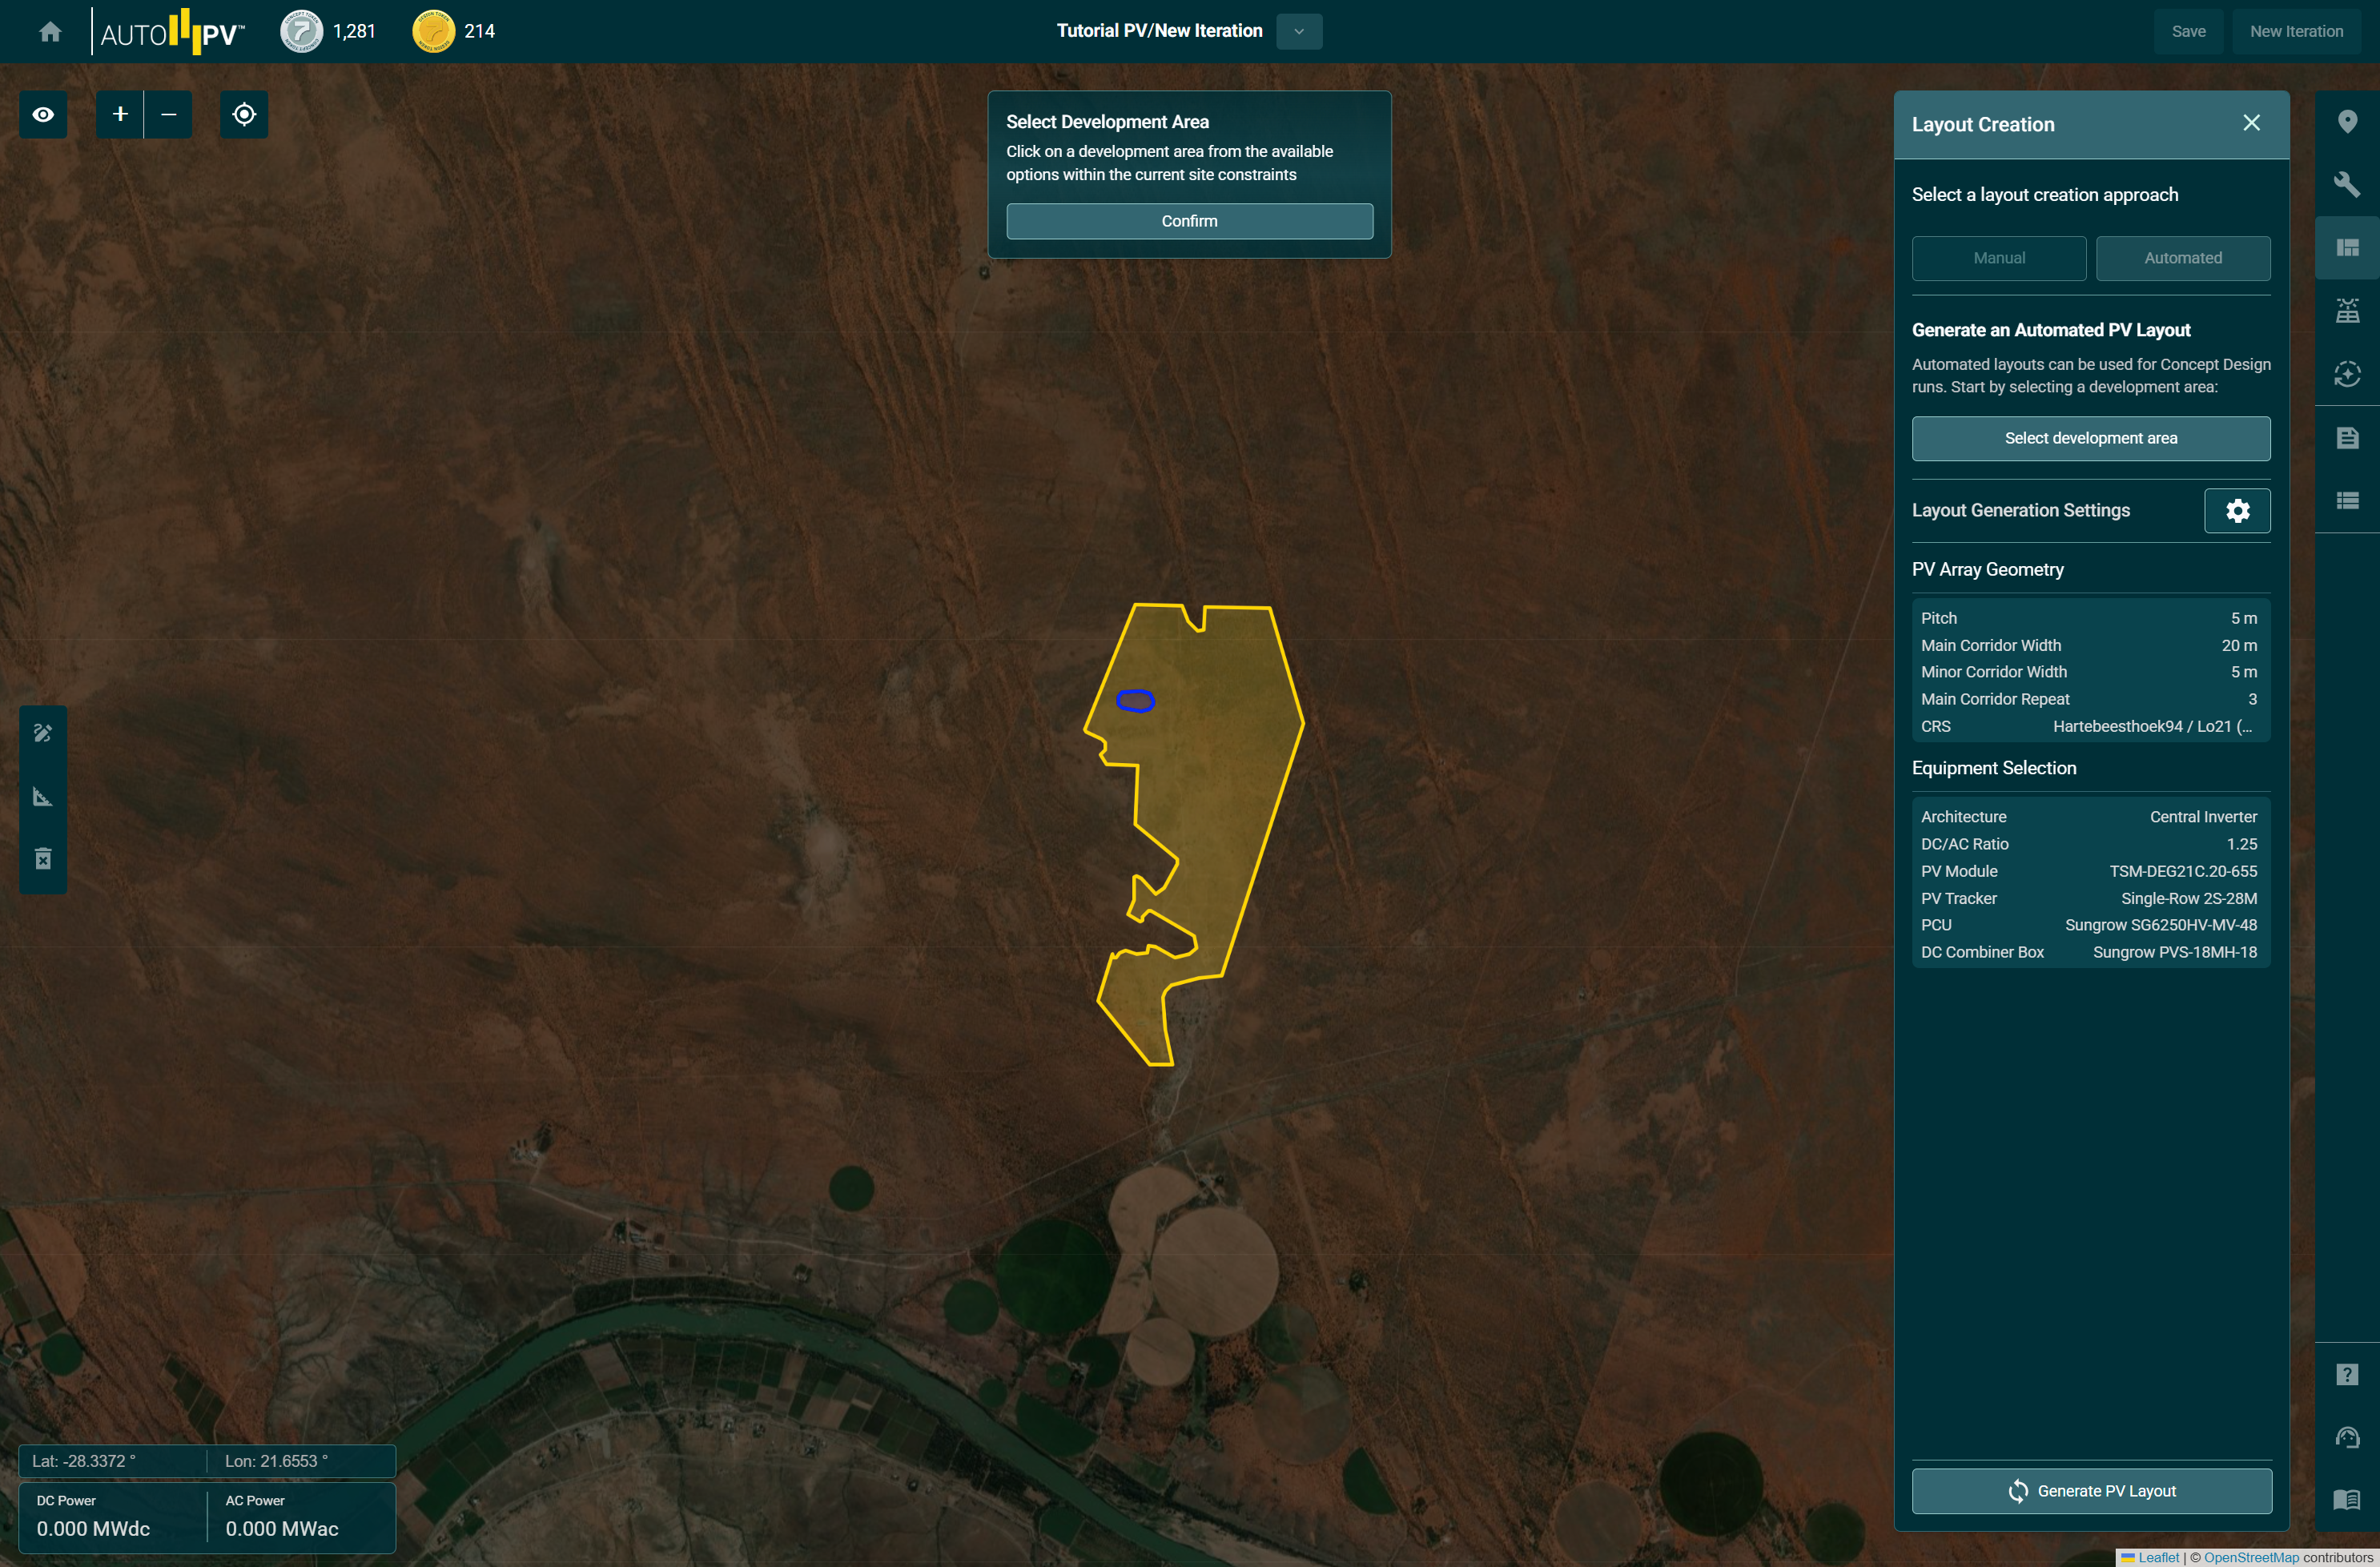
To generate a PV layout, start be selecting the development area to use for the automated layout generation by clicking the Select development area button.
The app will enter an interactive state whereby development areas can be selected by clicking on them. Click the Confirm button to confirm the development areas to be used and exit the interactive state.
Building a custom tracker
![]()
AUTOPV™ has some preconfigured built-in tracker configurations, but it is often necessary to build a custom tracker based on specific modules or custom number of modules in series. This can easily be done using AUTOPV™'s Tracker Configurator tool.
Layout configuring and creation
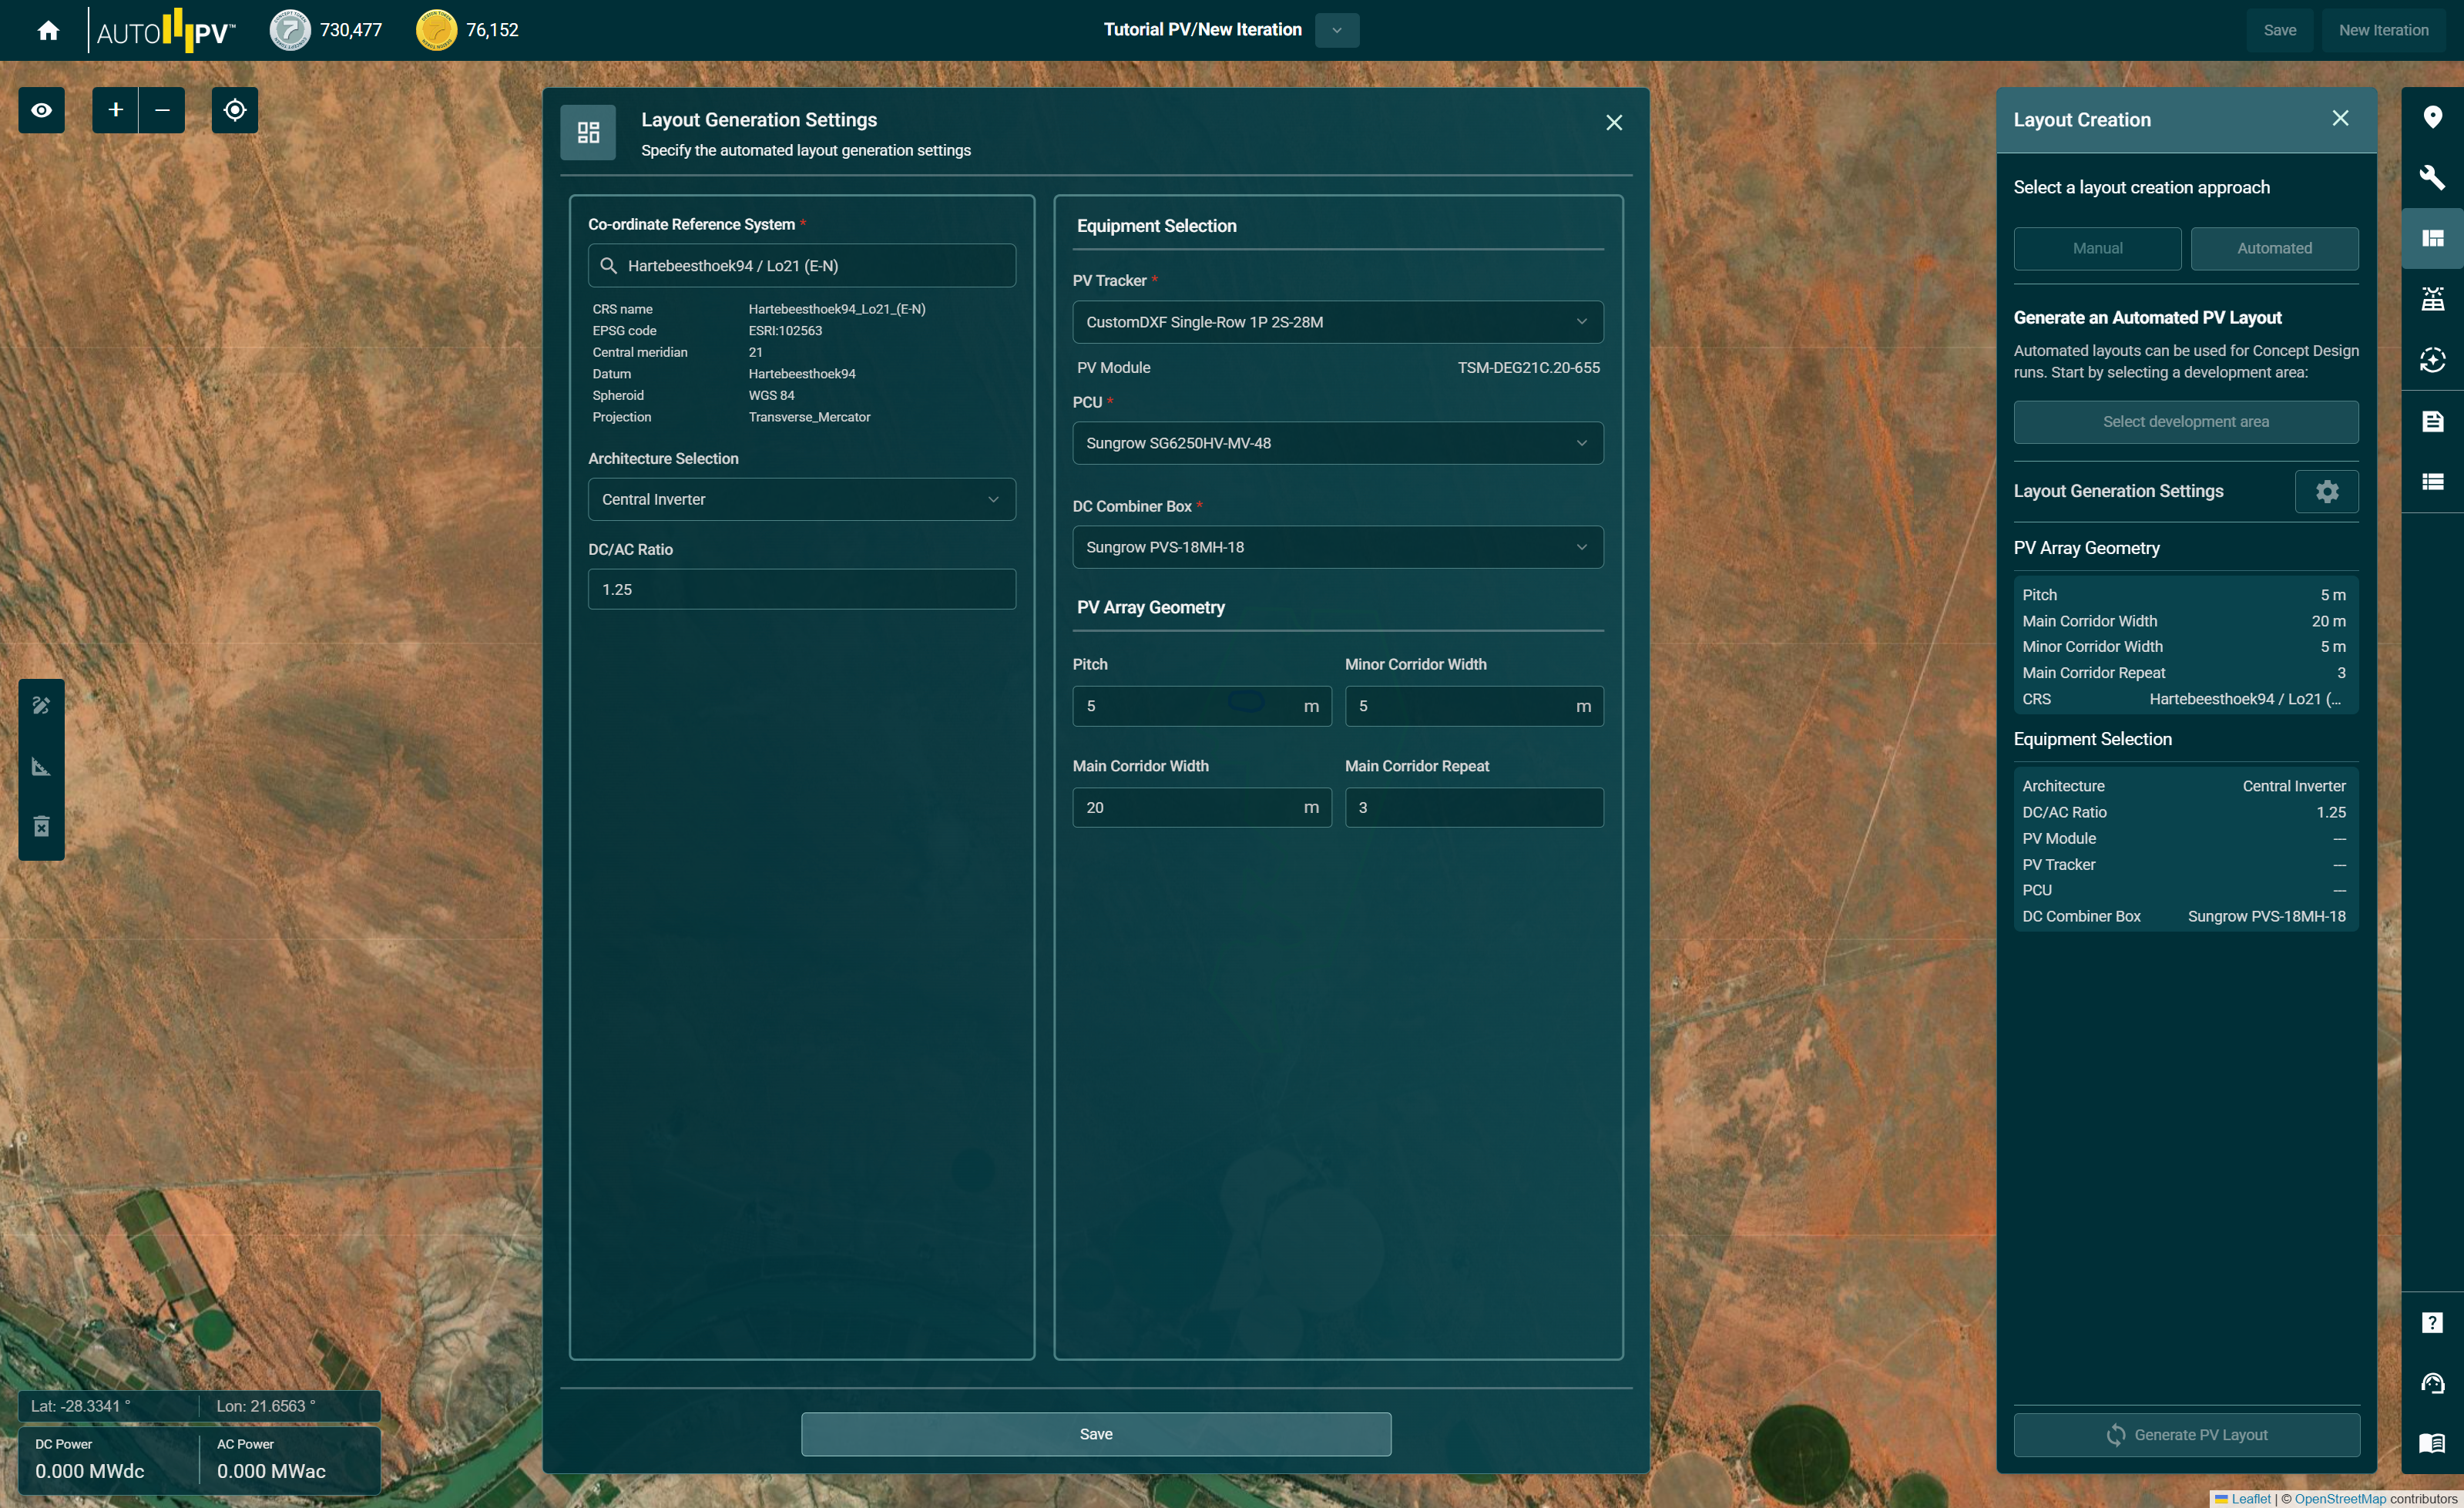
Developing a layout depends on several design decisions. The options available to shape how a site's layout is generated by AUTOPV™ is configurable in the Layout generation settings in the Layout Creation section.
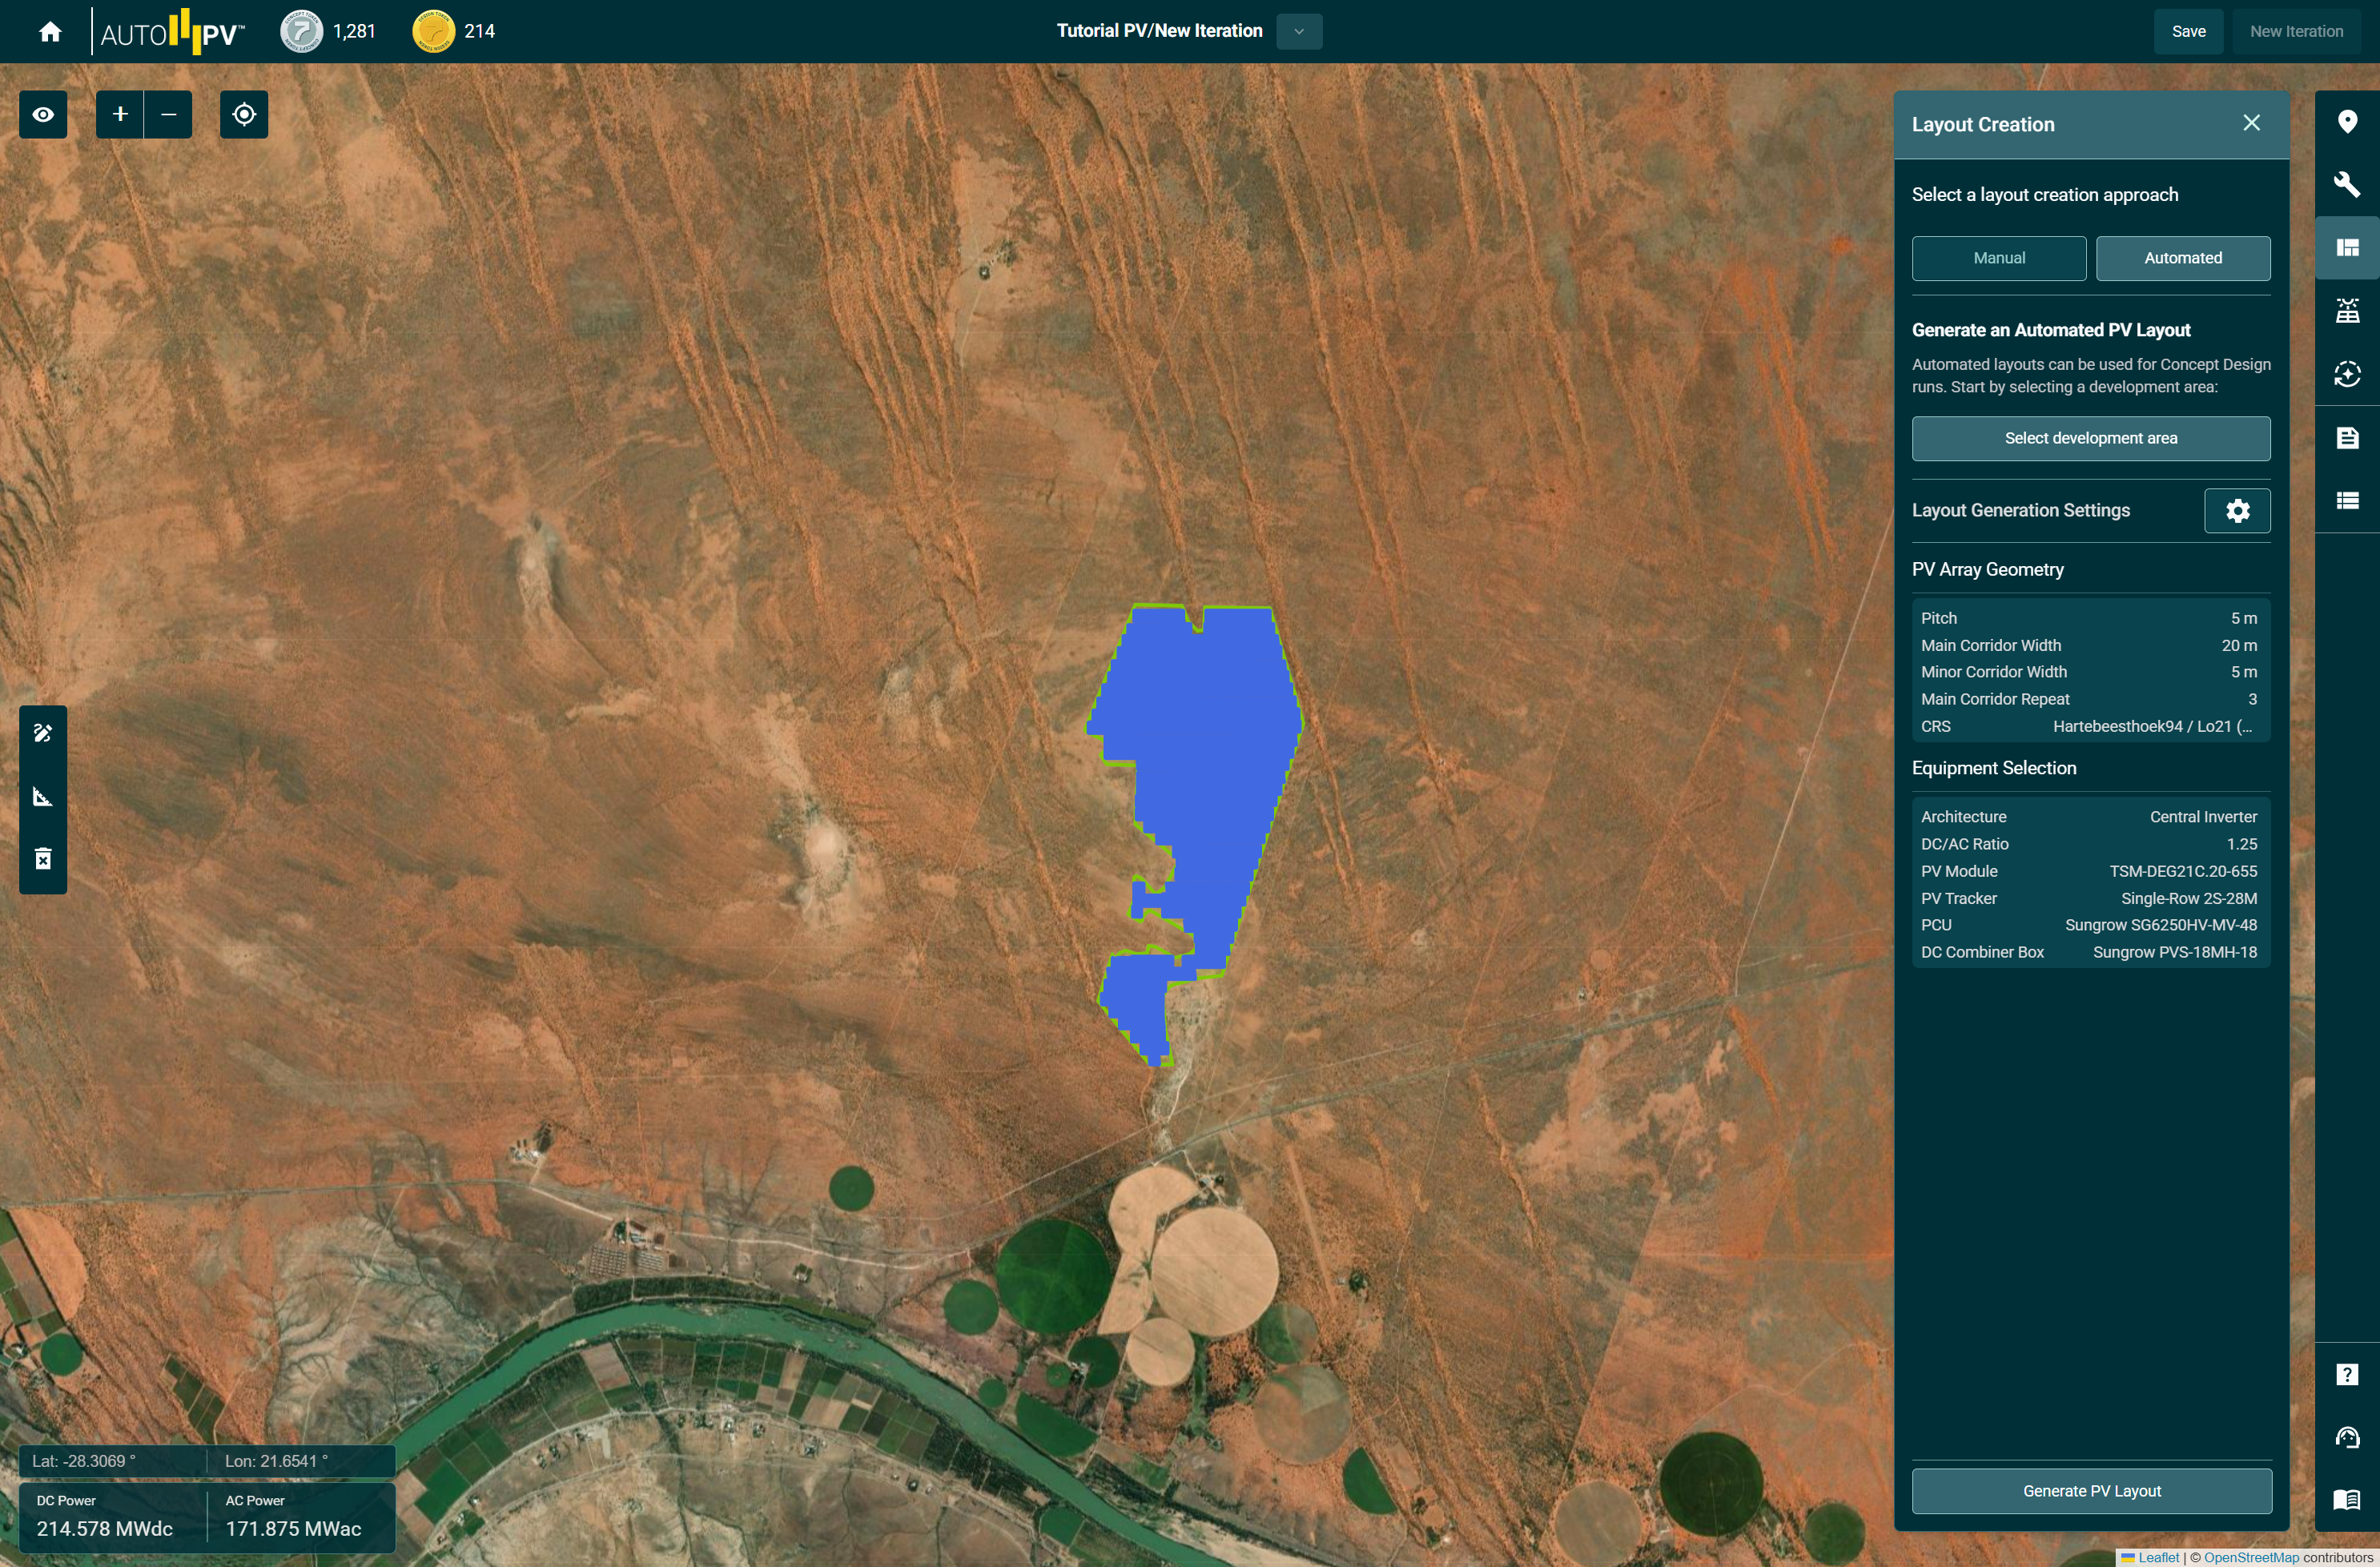
With the configuration done, click the Generate PV Layout button to fill the project boundaries with trackers to create a layout. Both the DC Power and the AC Power for the layout is calculated and displayed in the bottom left hand corner of the canvas.
If the configuration is updated, the existing layout must first be deleted before a new one is created.
Note: If a layout is not visible after clicking Generate PV Layout, make sure the correct CRS is selected for the project. If not, the layout may not be visible or may not be correctly aligned.